Your target is a connected WhatsApp chatbot with processed sources and a tested incoming message. Account and number acceptance also depend on Meta.
Before you start
- A Chatyx account with an available chatbot slot in your plan.
- Meta access with the necessary rights to the business assets you want to connect.
- The business number and access to the verification methods requested by Meta.
- Information and documents the chatbot should use, plus a simple question for the final test.
1. Check your account and number
Identify the business account and number you want to use. If several people manage your Meta assets, make sure the person performing the connection has appropriate permissions.
A number already used in the WhatsApp Business app needs particular care. Reuse or coexistence depends on the offered flow and account eligibility. Do not delete an existing account to bypass a refusal; ask support to confirm the right steps for your situation.
Allow time for Meta’s requirements. Connection does not guarantee immediate number approval or that every WhatsApp fee is included in your Chatyx subscription. Check pricing and the terms of connected services.
2. Select WhatsApp in Chatyx
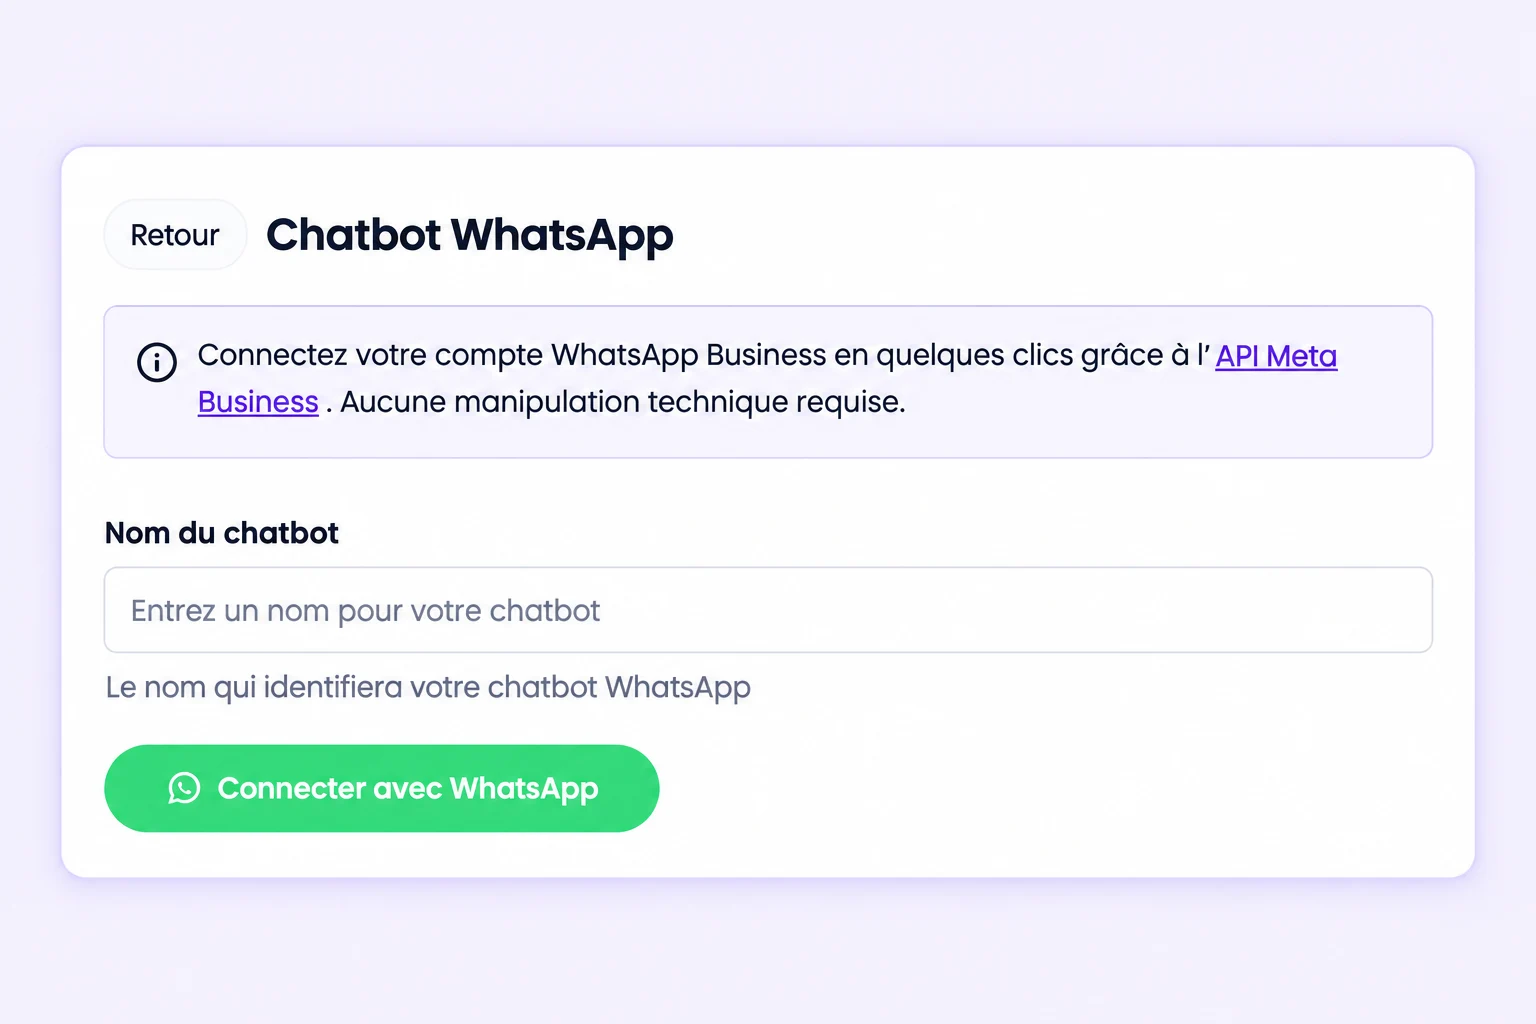
Open Channels and select WhatsApp. The WhatsApp Chatbot form includes a Chatbot name field. The illustration shows the French interface, where these labels are Canaux, Sélectionner and Nom du chatbot.
Choose a recognizable name, such as “Horizon Workshop — WhatsApp” for a fictional business. The limit is 64 characters. This flow creates a dedicated chatbot; it does not automatically turn your existing website chatbot into a WhatsApp bot.
3. Complete the Meta connection
Select Connect with WhatsApp. In the Meta window, use the intended business account and follow the displayed steps for WhatsApp assets and the number. Read the permissions before granting them.
Screens vary according to account status. Complete the requested verification, return to Chatyx and wait for the connection message. Check that the new chatbot appears in your account. Closing the window early does not complete the connection.
If a step fails, keep the error text and note when it appeared. Do not share passwords, verification codes or access tokens in a support request.
4. Add sources to the WhatsApp chatbot
Open Data sources for the newly created chatbot. Add the necessary pages or documents and wait for processing. Do not assume that sources or settings from another chatbot were copied.
Define a clear scope, such as service information, enquiry preparation or directions to your team. For the fictional workshop, a document listing opening hours and supported repairs is enough for a useful first test. Avoid commitments that your sources cannot support.
5. Verify a complete exchange
From a different WhatsApp account you control, send a question to the connected number. Start with one answered by a source, then try an out-of-scope question.
Check that a reply arrives in WhatsApp and find the exchange under the right chatbot in Chatyx. A successful connection message without a working reply is not enough to validate the customer experience.
This checks an incoming message. It does not demonstrate unrestricted campaigns or follow-ups to all contacts: business-initiated communications remain subject to WhatsApp rules and channel capabilities.
Check the result
- The expected WhatsApp chatbot appears after the Meta flow.
- Its own sources are processed and match the stated scope.
- A message from a separate account receives a relevant answer.
- The exchange is visible in Chatyx and response limits have been tested.
Troubleshooting
The Meta window does not open.
Check the chatbot name and allow the form to finish loading. Check whether the browser blocked a pop-up and allow it for this flow if needed. Report any persistent error to support.
Meta refuses the account or number.
Read Meta’s requirements: asset permissions, account status and number verification can prevent connection. Chatyx cannot guarantee acceptance. Have the situation checked before changing an existing WhatsApp account.
The chatbot is connected but does not reply.
Check the actual connected number, selected chatbot, processed sources and remaining quotas. Try a new incoming message from a different account. If needed, send support the test time and error message without connection secrets.
Need help with your setup? Email support@chatyx.fr.
Further documentation
Run your own test
Start with a clear scope and a few reliable sources. Check the answers before expanding to visitors.
Open Chatyx